Custom Vehicle Table: Importing/Exporting
Importing/Exporting Values in the Custom Vehicle Table
The Import/Export feature allows you to work with Custom Vehicle Tables in Excel format. This gives you the option of adding new vehicles by editing values in excel and then importing.- Click on the Settings menu and choose the Vehicle Tables sub-menu.
- Select the Import/Export sub-menu.
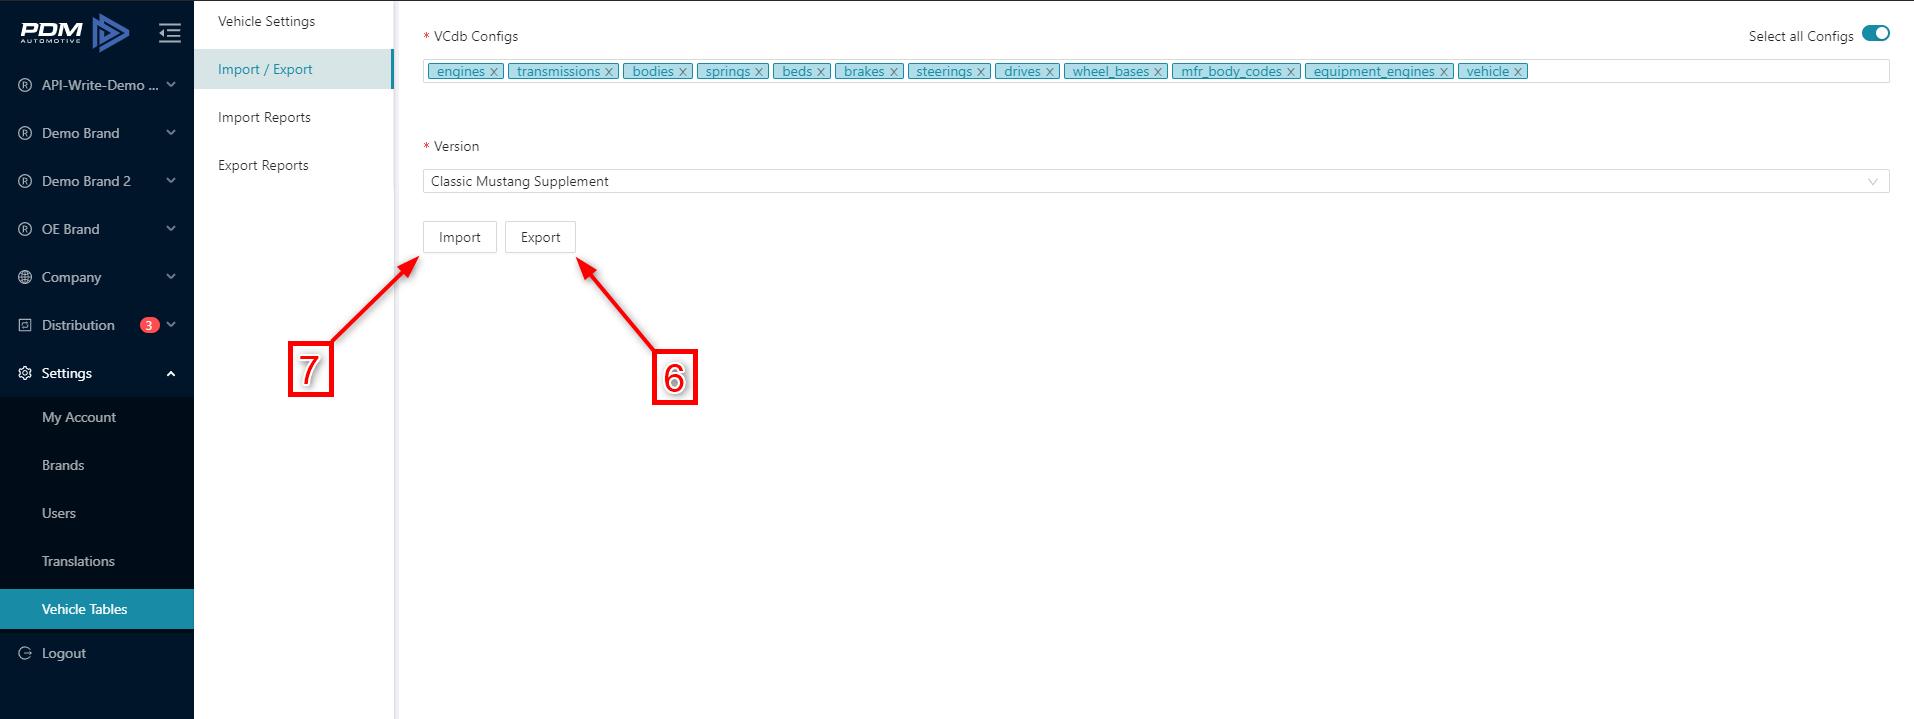
3. Choose one or more segments from VCdb Configs drop-down to Export/Import.
4. You can also toggle the Select all Configs switch.
5. Choose a Custom Vehicle Table from
the Version drop-down to
export/Import.

6. Click
the Export button to begin download. Each segment gets
exported into a separate tab of the excel sheet.
7. Click
the Import button.
8. Drag and drop the
excel file into the +Upload Excel or Click +Upload Excel button to select a file.
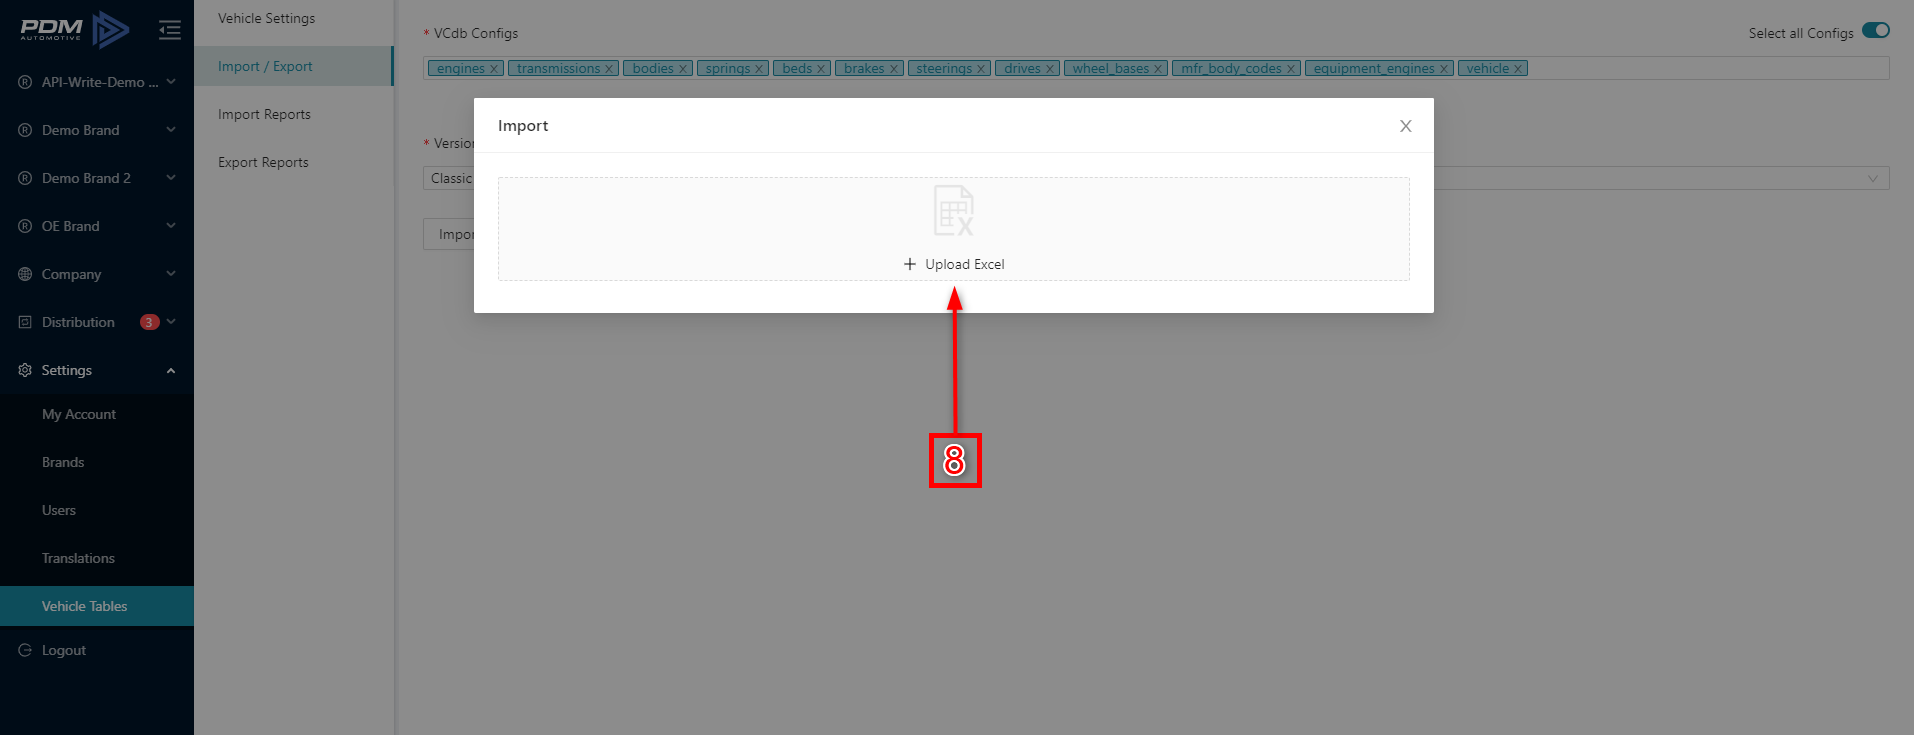

When importing new vehicles into a Custom Vehicle Table, the Make, Model, Year, Submodel, and Region fields are mandatory. All other empty fields will be filled with dashes or unknown values during the import.
9. Click
the Import/Export Reports menu on
the left panel to view the import/export reports.
- Custom Vehicle Table: Overview
- Custom Vehicle Table: Adding a New Custom Vehicle Table
- Custom Vehicle Table: Adding New Sub Configurations and Assigning to Vehicles
Related Articles
Custom Vehicle Table: Overview
Custom Vehicle Table Overview Custom Vehicle Table allows the user to expand the Autocare VCdb table by configuring products for the vehicles that were not officially sold in the USA, and add custom configurations to the existing vehicles in the ...Custom Vehicle Table: Adding a New Custom Vehicle Table
Adding a New Custom Vehicle Table Adding a new custom vehicle table through Application segment: Select a Brand and click All Products Select the Application segment and select a product from the catalog Click on the Add New Application button 4. A ...Custom Vehicle Table: Adding, Changing, and Deleting Vehicle ID
Adding New Vehicle ID Select a Brand and click All Products. Click the Applications segment and select a product from the catalog. Click on the Add New Application button. 4. A new window appears. Click the Edit VCdb button. 5. Select a Custom ...Custom Vehicle Table: Adding New Sub Configurations and Assigning to Vehicles
Adding New Sub Configurations and Assigning to Vehicles Select a Brand and click All Products. Click in the Application segment and select a product from the catalog. Click on the Add New Application button. 4. A new window pops up. Click on the Edit ...Custom Fields for Receivers
Custom Fields for Receivers Custom fields are used for anything outside of ACES & PIES Do you need to maintain additional information outside of ACES & PIES? With PDM, you can create as many custom fields as you like for your Receiver account. This ...