Connecting to ChannelAdvisor® (Beta)
ChannelAdvisor
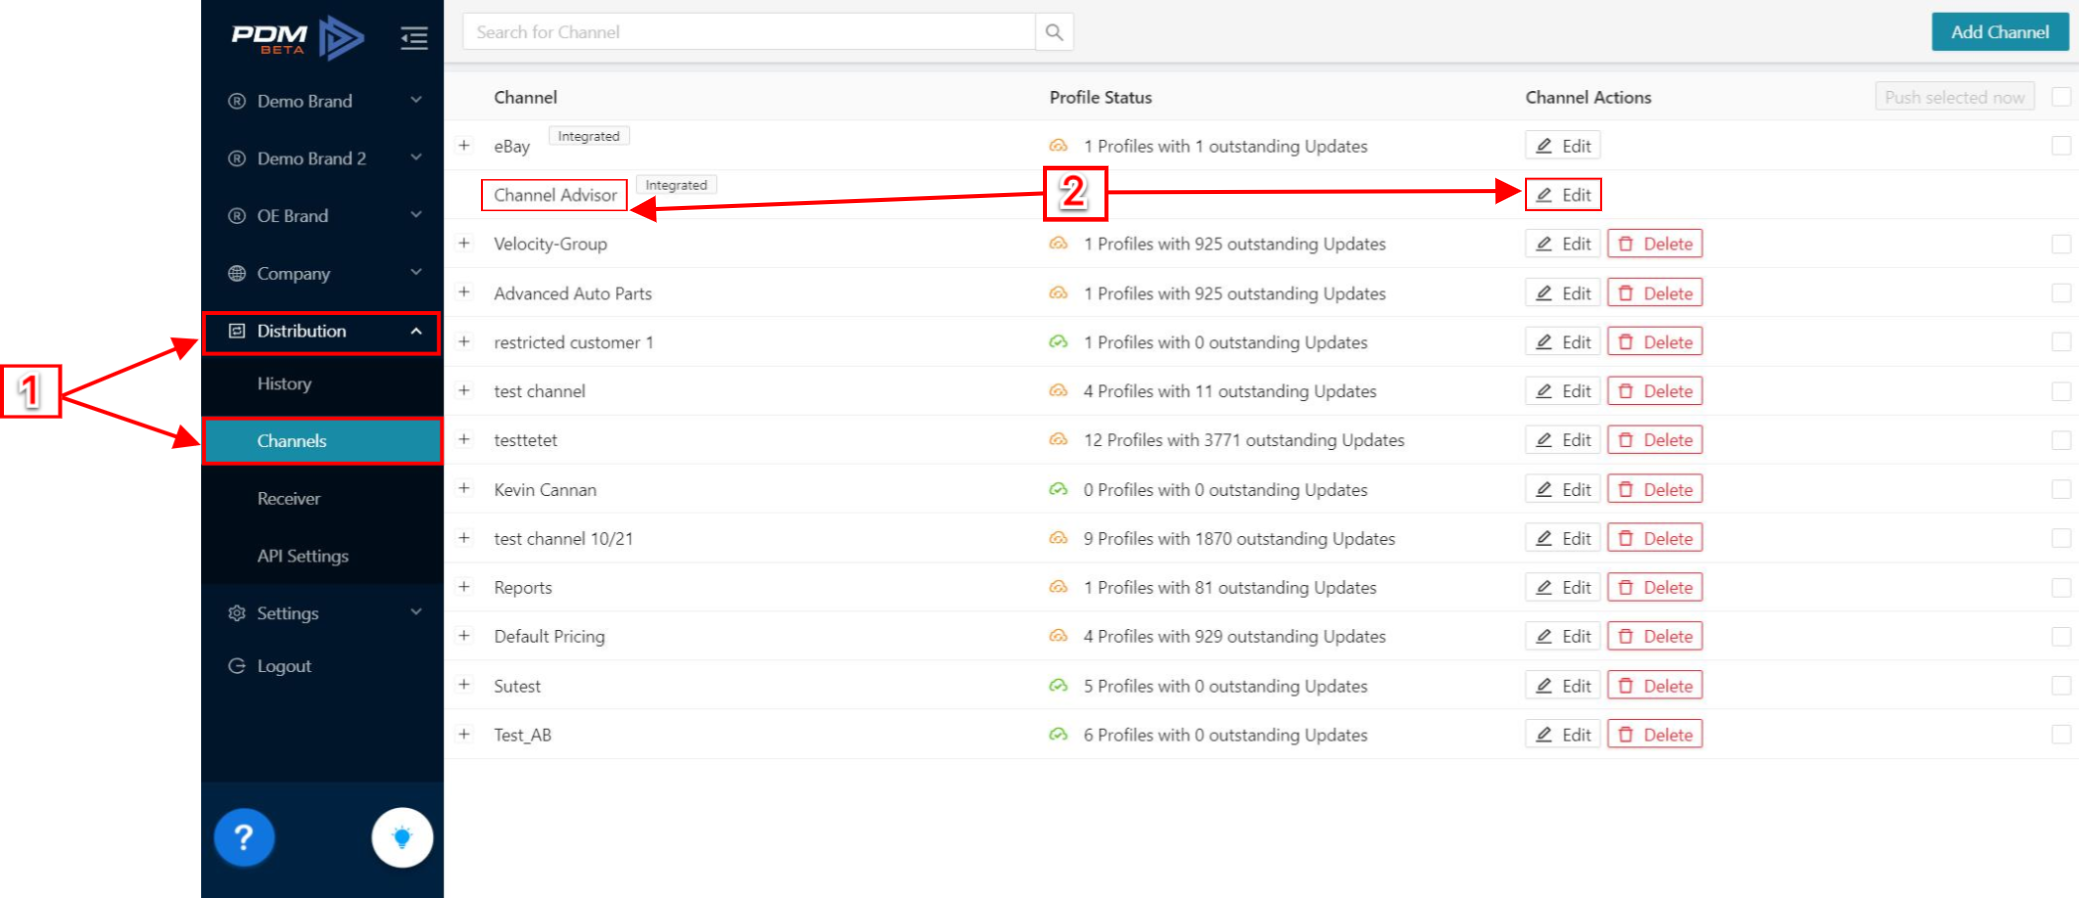
- Navigate to Distribution and click on the Channels button.
- You can see the ChannelAdvisor option listed at the left. Click on the Edit button.
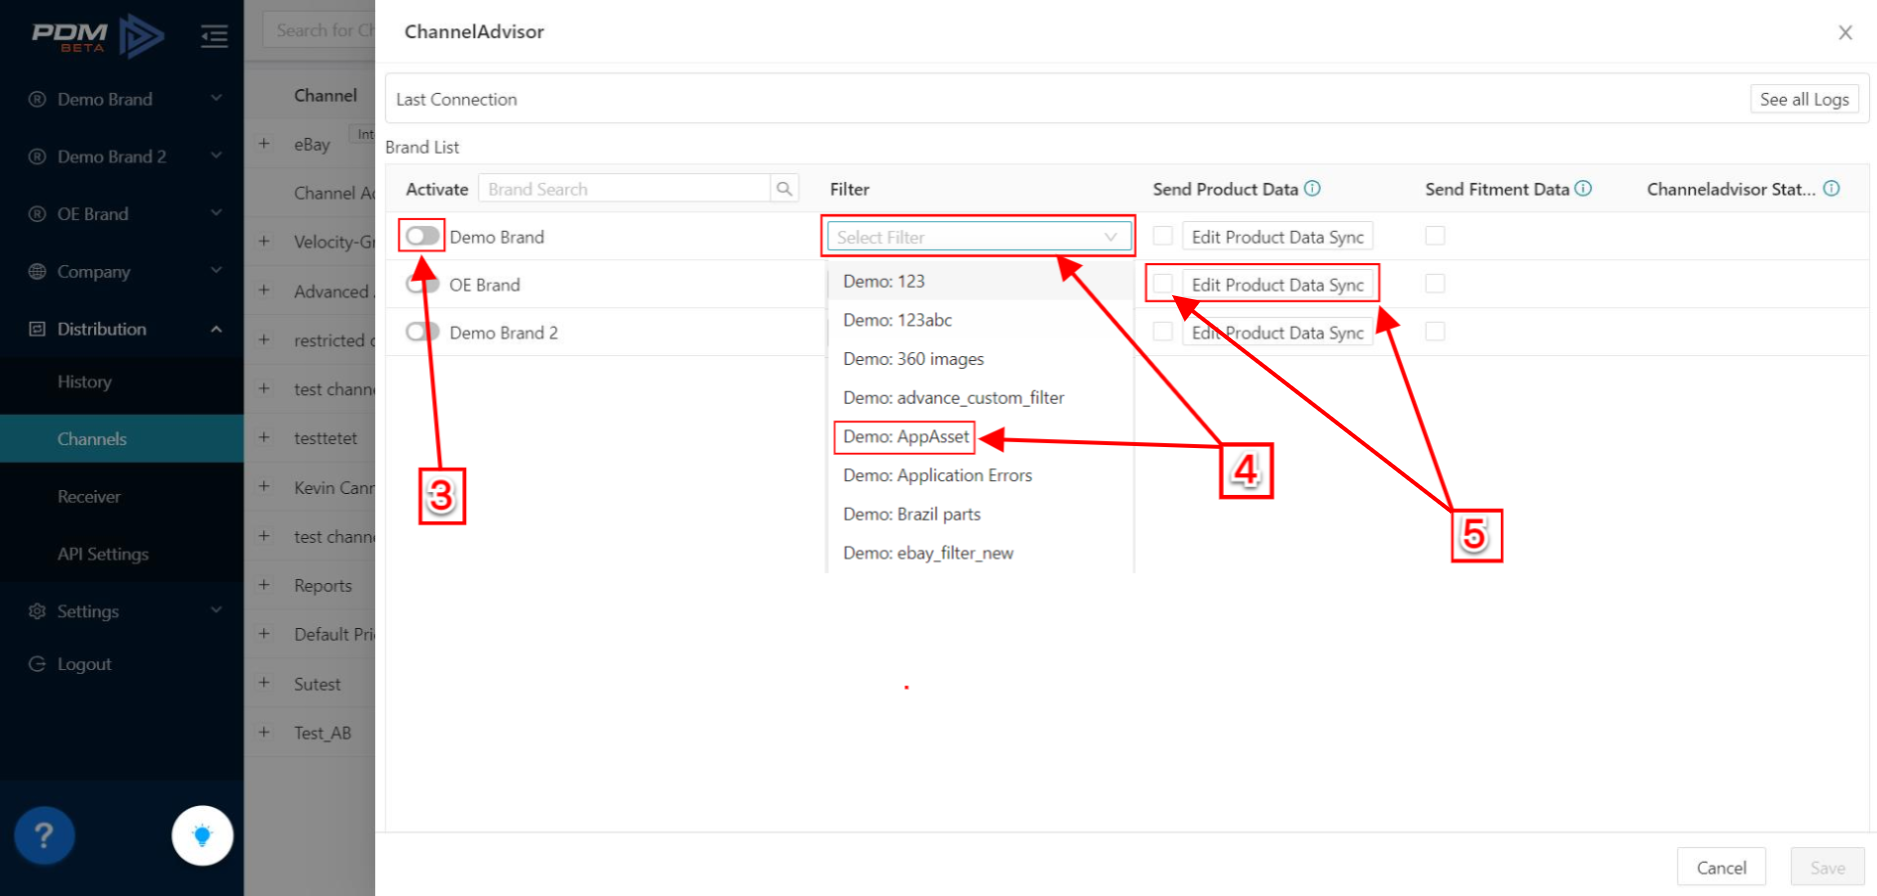
- Toggle the switch to Activate/Deactivate and select which Brand you would like to be synchronized with the ChannelAdvisor.
Click in the Display menu; you can apply a filter to select the products that should be submitted to the ChannelAdvisor.

Filters found in the filter option have been created previously within each brand.
- Decide if you want to send product data by clicking on the checkbox. Configure the data you want to provide to the ChannelAdvisor with a custom template by clicking the Edit Product Data Sync button.
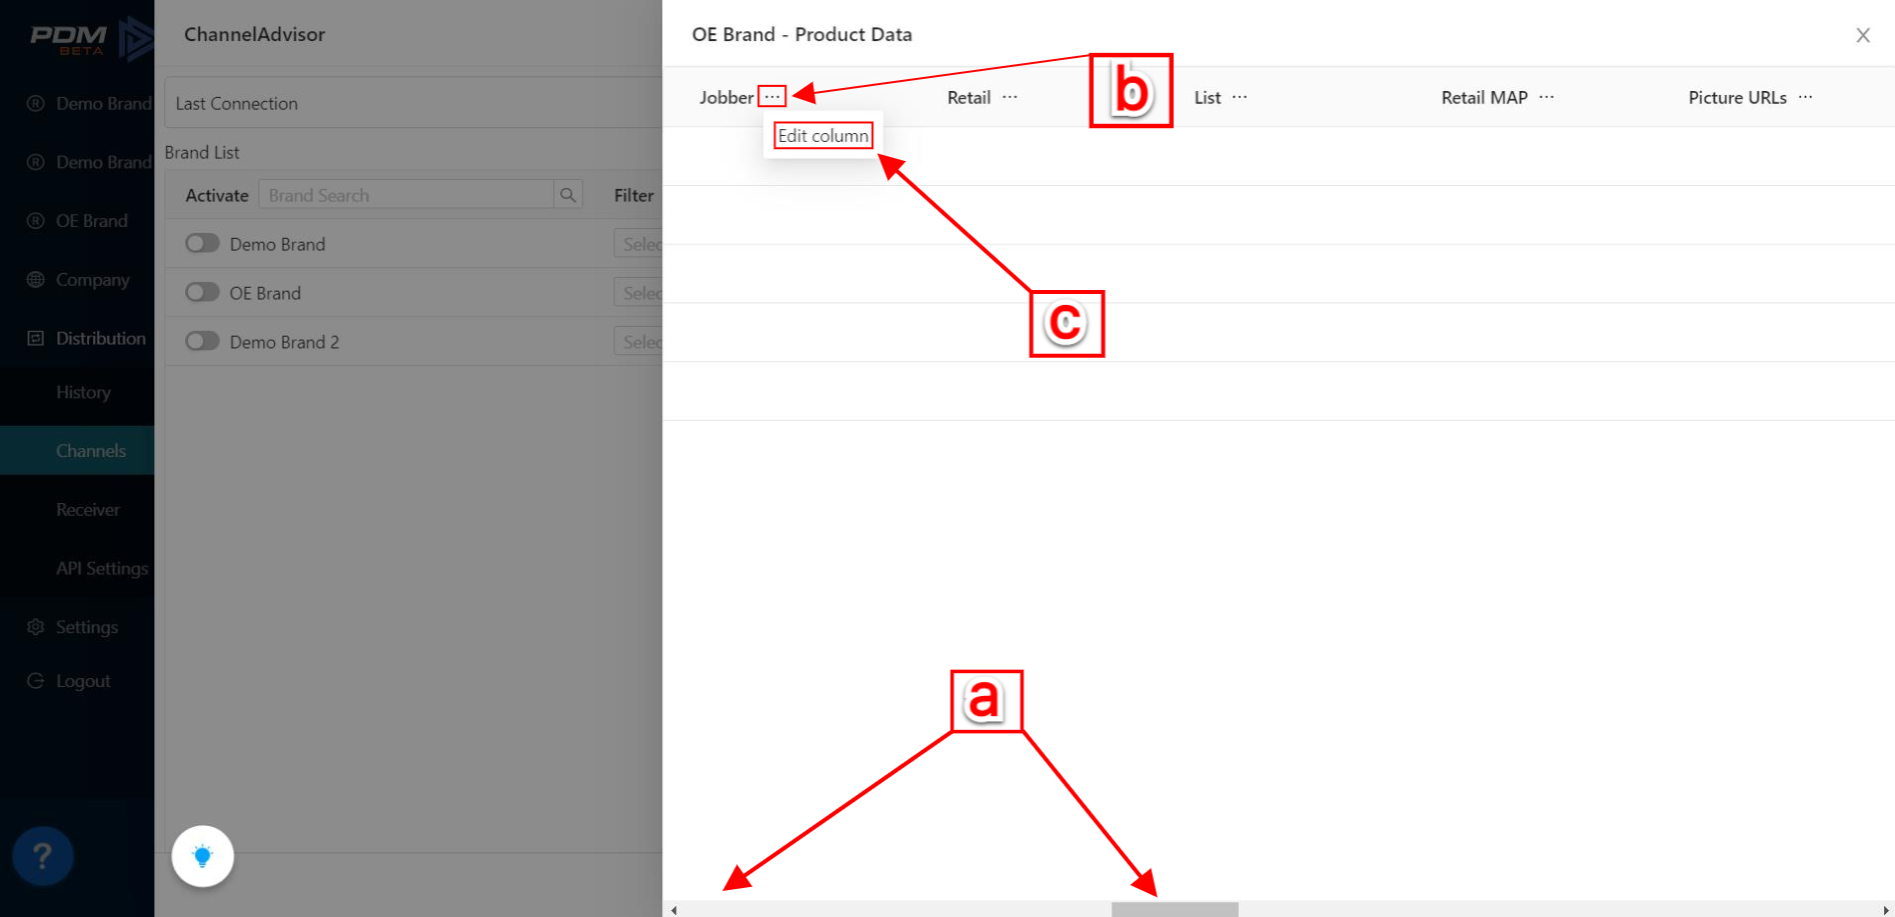
You would need to edit the template that goes to the ChannelAdvisor. You will have pre-configured options, and only some selections need to be made.
a. Move the scrollbar to the right; you will see different options.
b. Click to edit your selection.
c. Click the Edit column button.
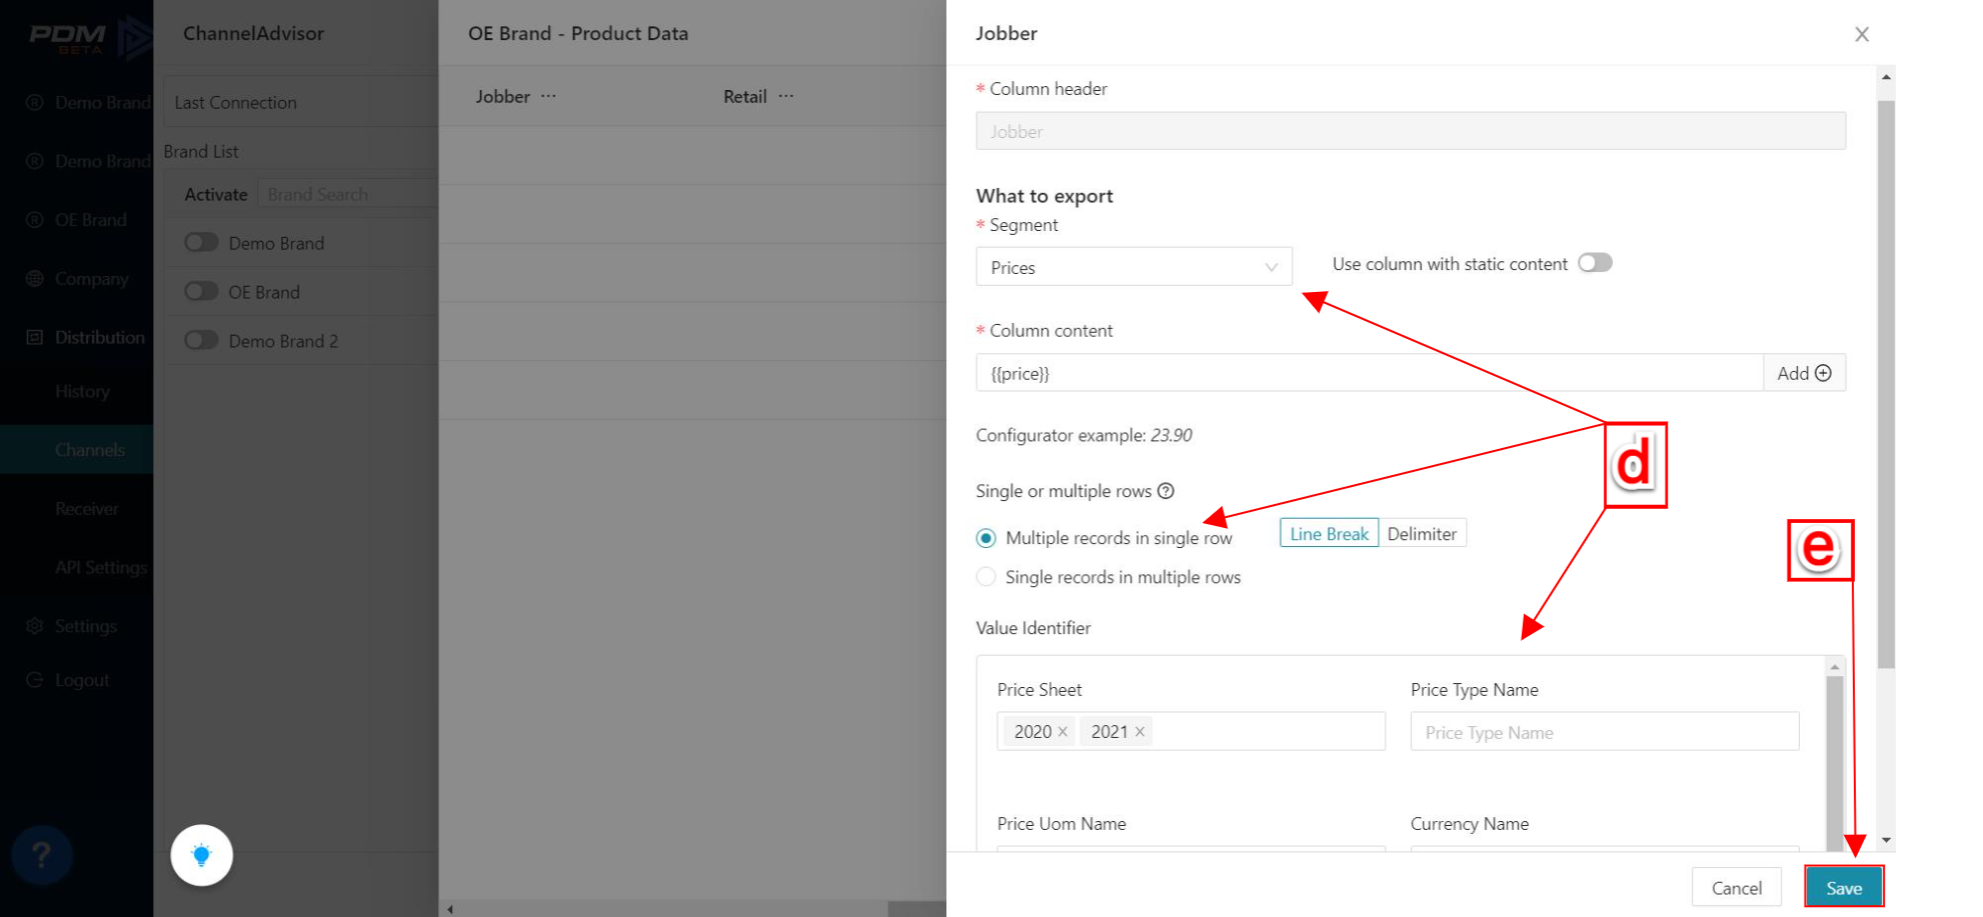
d. Make your selections.
e. Click the Save button.
- Decide if you want to Send fitment data by clicking on the checkbox. The format is pre-defined by ChannelAdvisor.
- ChannelAdvisor must accept your brand to be loaded to their system. Here you see if they have accepted your brand.
Click to Save your selections.
