Automation feature for Brand accounts
Automation Feature Overview
With the Automation feature, you can create, edit and run scripts in the UI to automate processes or repetitive tasks, and it doesn't require you to spin up your own server or automation environment. An example use case is every time you add a new product with a specific Part Type; you can set the automation to fill in Descriptions fields, Custom Fields, Attributes, etc., with the click of a button!
 The Automation feature is an add-on. If you are interested in this, please contact us at sales@pdmautomotive.com; we'll be happy to assist you.
To access the Automation Section:
- Click on Distribution and select API.
- Click on the Automation tab.
- Select New automation
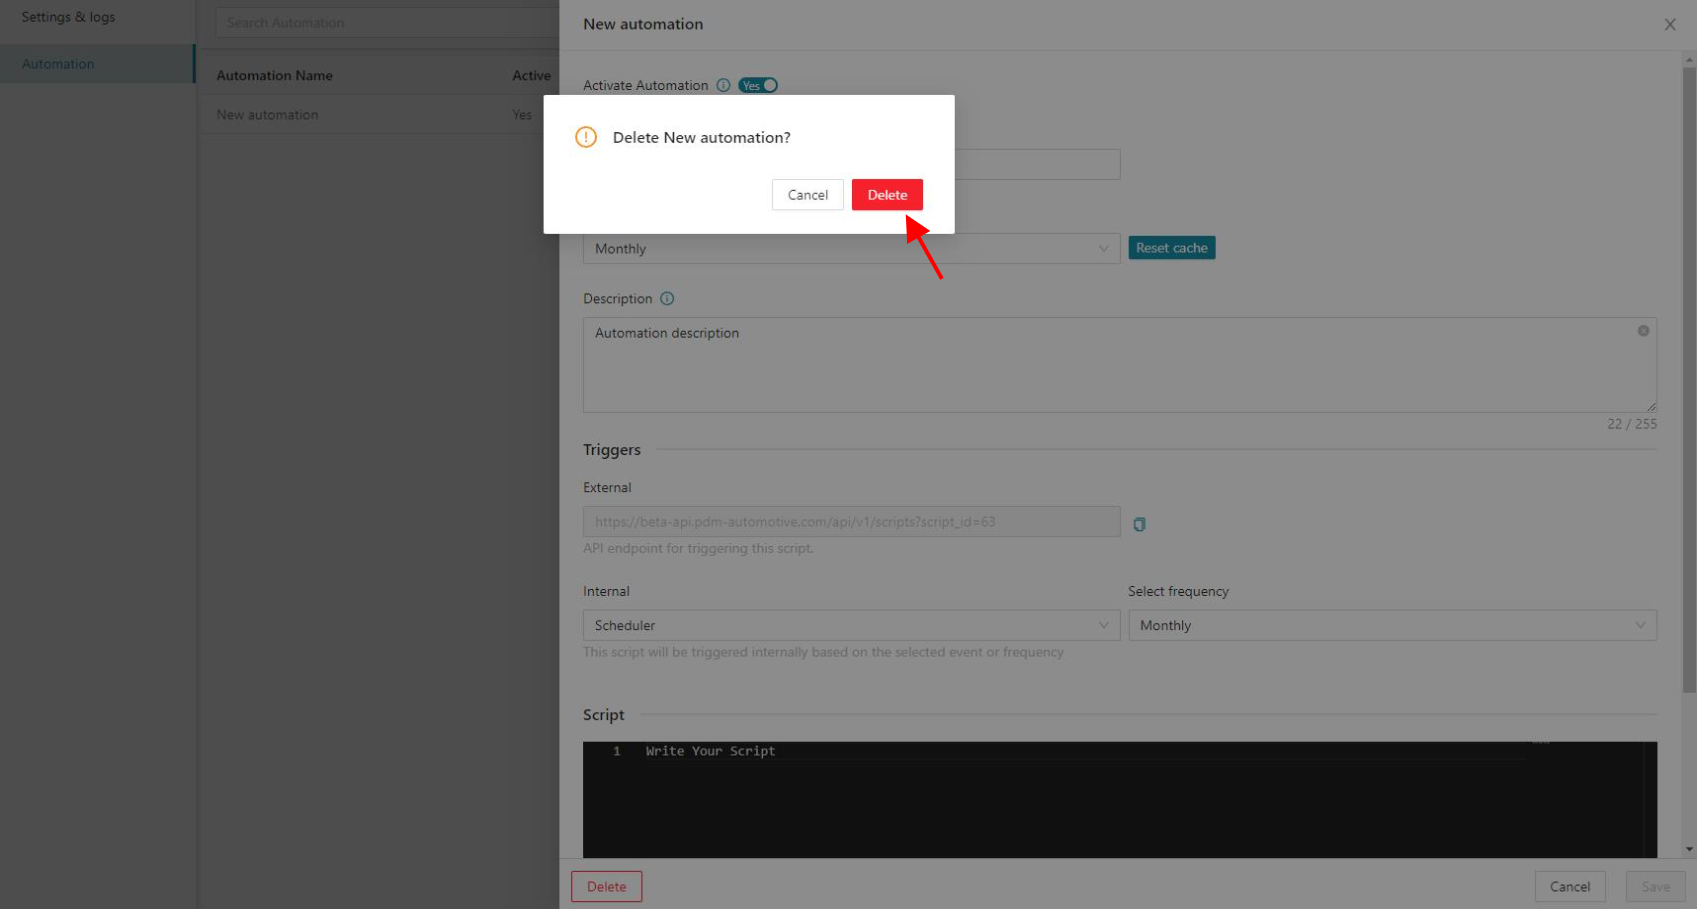
4. Activate your automation. Once activated, you can run the automation according to the configured triggers. The cache will be restored according to the TTL that was configured.
5. Name your automation.
6. Select the TTL (Time-To-Live) at which the cache will be restored.
7. You can add a brief description of what the script will do.
8. Configure how the automation will be triggered.

Once the automation has been activated, you can run the automation according to the configured triggers.
- External triggers: We will provide an API endpoint for triggering the script.
- External triggers: We will provide an API endpoint for triggering the script.
- Internal triggers: The script will be triggered internally based on the selected event or frequency.
***As of right now, you can open and edit the Automation screen, but you will not be able to save the automation. Please use the chat or ticketing system to reach out and explain the automation you'd like to add. This will ensure that the script is added correctly and any potential mistakes are avoided***
PDM will provide a Param sample for script execution when selecting the trigger based on an Event.
You can copy this sample and paste it into the code editor area instead of writing from scratch. For all the events, the Part Number needs to be selected. You can search by part number; otherwise, the last part number used will be selected by default.
9. Add or write the code and Save your changes.
10. The new automation will be listed in the main table.
11. You can search by automation name.
12. If the automation is active, you will be able to Run/Edit the script or Reset the cache. Click on Edit script.
You can also run the script within the drawer. Save the script before you run it.
13. You can delete an automation from the list, by clicking Edit script and then Delete.
Run Automation Script from the Catalog
1. Click on a Brand and select All Products.
2. Select one or more products from the Catalog.
3. In the Actions dropdown, select Run Script and select the automation to run.
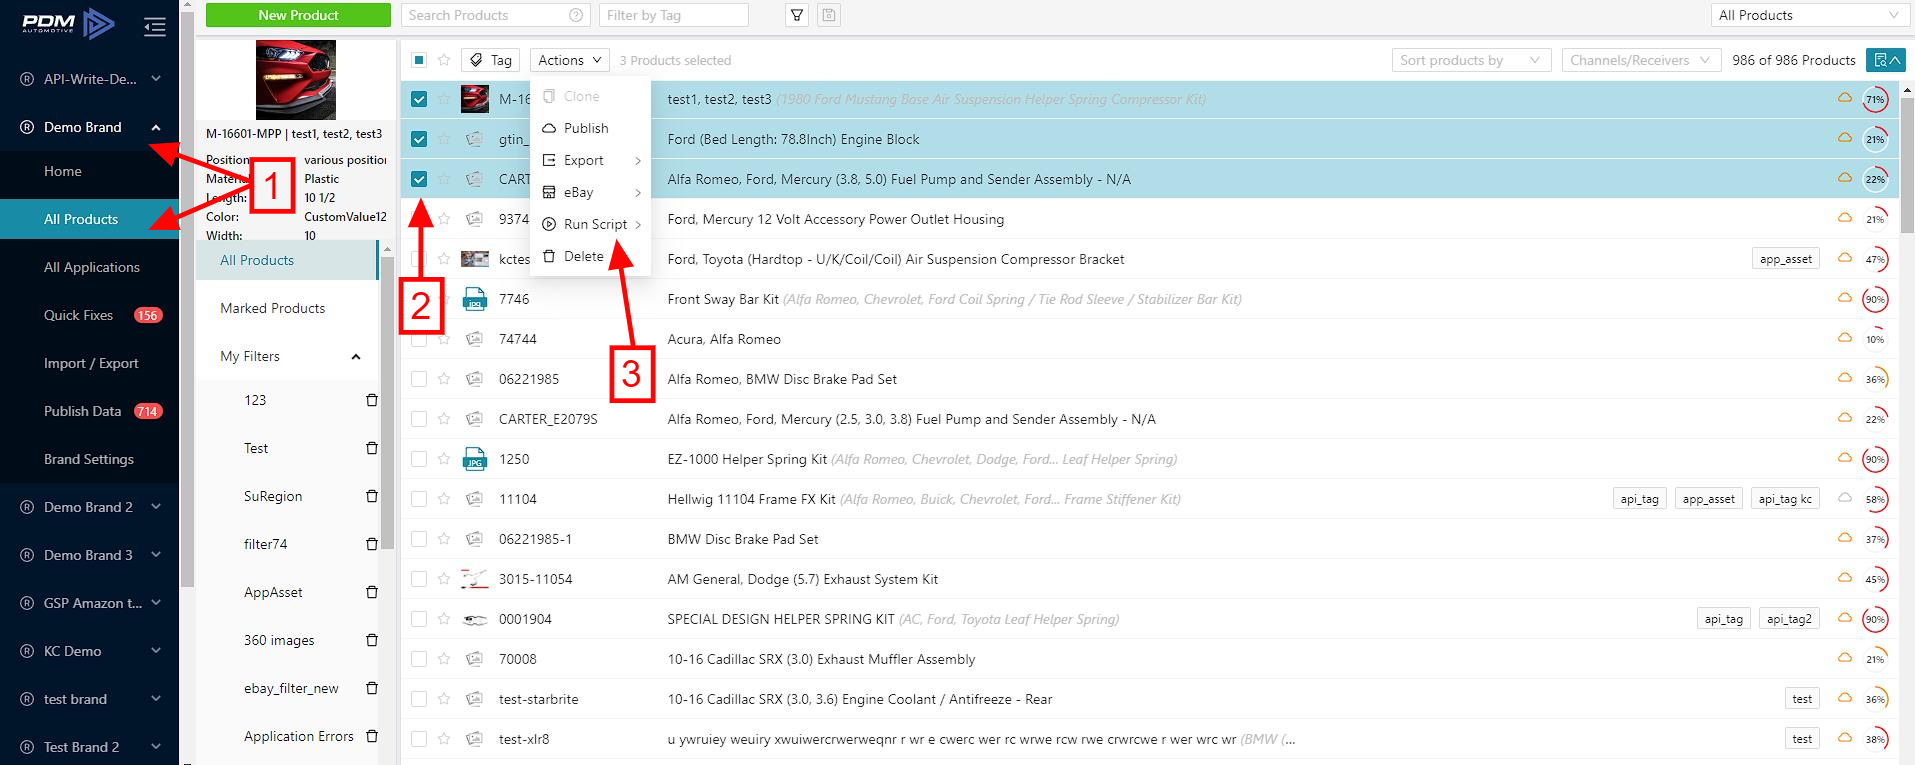
2. Select one or more products from the Catalog.
3. In the Actions dropdown, select Run Script and select the automation to run.
Related Articles
Automation feature for Receiver accounts
Automation Overview With the Automation feature, you can create, edit and run scripts in the UI to automate processes or repetitive tasks, and it doesn't require you to spin up your own server or automation environment. An example use case is if you ...API: General Information
It is not only easy to create high-quality data but also to access it - find out how! The documentation of our API can be found here: https://api-doc.pdm-automotive.com/?version=latest#intro The API is an add-on. If you are interested in this, please ...Bundle Feature
Bundle Feature Account-level users have an additional option for assigning application data inheritance relationships. Bundle Feature is an upgrade version of the default Link Application feature. In Link Application, parent-child relationships are ...Private Label Feature
Private Label Feature Easily create Private Label files! The Private Label feature is available to you and your customers when using the channels to distribute data. Make your data available with an alternative Brand Code and optionally also an ...Brand Table vs. Private Brands
PDM is driven by the Auto Care Brand table. By default, you have access to all brands assigned to your parent company in the Brand table. Registering your brand in the Auto Care brand table is free. Private brands are not automatically offered to the ...