Adding and Deleting Digital Assets in the Application Segment
Adding and Deleting Digital Assets in the Application Segment
PDM tool has two options to add and delete the digital Assets in the application segment,
- Adding/Deleting Digital
Assets using Edit Application.
- Adding/Deleting Digital
Assets using Import/Export.
Adding/Deleting Digital Assets using Edit Application
- Select
the Brand and choose All Products.
- Select
the required product from the catalog and choose the Application Segment.
- Click the Edit Application button. Edit application
window pops up.
4. Select
Digital Assets from the left panel.
5. Click
Add from local PC option then browse and choose the required image. 7. Click
Save Asset. You can also add multiple digital assets to an application (repeat the same steps).
9. Close
the Edit Application window.
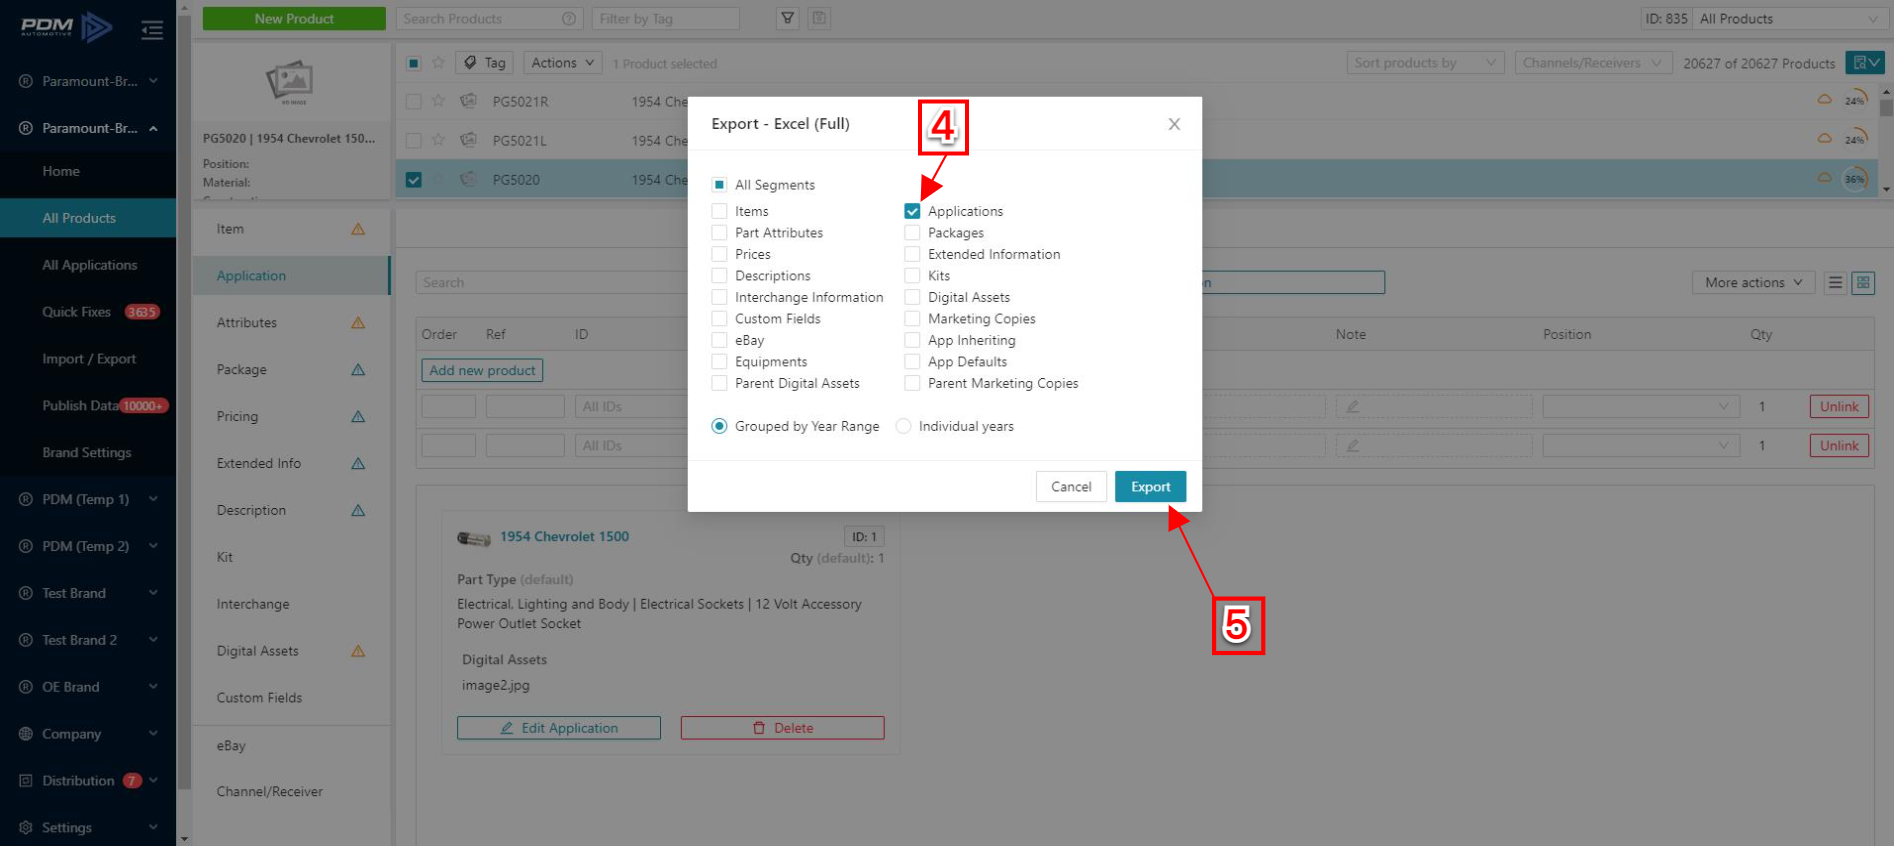
Adding/Deleting Digital Assets using Import/Export
- Select
the Brand and choose All Products.
- Select
the required product from the catalog and choose the Actions dropdown.
- Select
Export option and Choose Excel (Full).
5. Click
Export.
6. Download
the exported excel from the Export Reports.
7. Open
the downloaded excel and remove the data related to the digital assets.
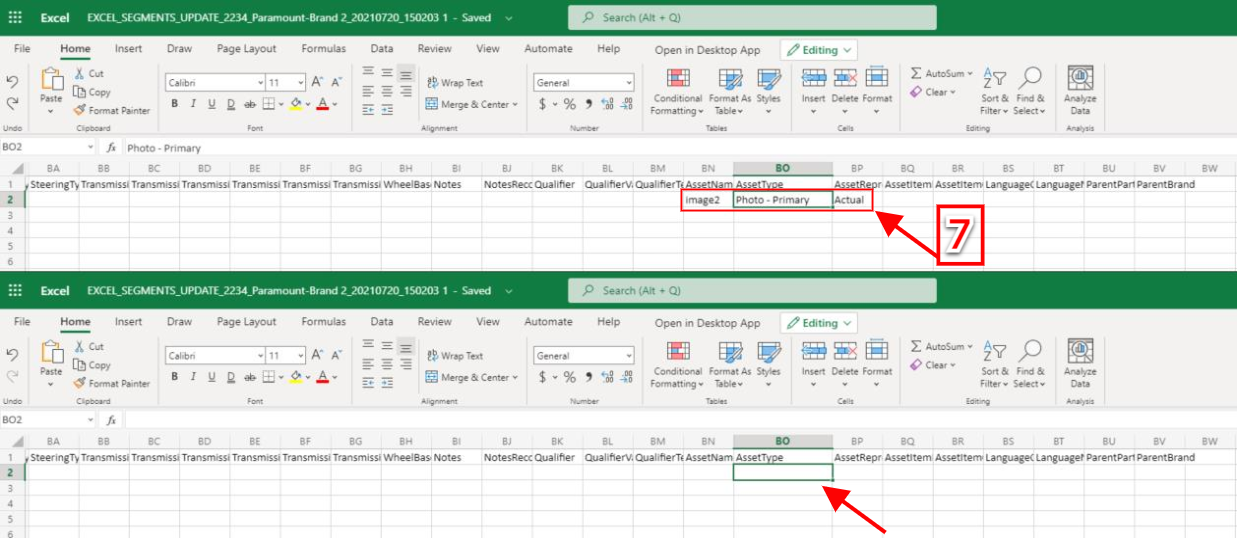
8. Save
and import the excel to remove the digital assets from the application.
9. Refresh
the page, go back to All Applications, and select the product to see the changes.
11. Refresh
the page to see the changes.
Related Articles
Adding 360 Digital Assets
Adding 360 Digital Assets PDM tool has two options to add and delete 360 digital Assets: Adding 360 Digital Assets using the PDM UI for one product Adding 360 Digital Assets by Import for many products Using the PDM UI for one Product Click on ...Digital Assets Segment Overview
Digital Assets Segment Overview The Digital Asset Segment allows you to provide various digital assets: Images Installation Instructions Videos Warranty Sheets etc. Important details: Asset Type (What kind of Asset is being provided) Actual or ...Bulk Uploading of Digital Assets
Bulk Uploading of Digital Assets Easily Upload thousands of digital assets and have them assigned to your products. There are two ways to upload Digital Assets in bulk: Uploading the Digital Assets as a zip file Uploading the product to Digital Asset ...Adding products
Adding products After going through your First Steps in the tool, you can start adding products to your account. Create New Product Click on a Brand and select All Products. Click in New Product. 3. Write a unique PartNumber 4. Select a ...Storage & Distribution of Digital Assets
We offer you multiple ways to distribute your digital assets Where are we storing your digital assets? You have two choices: We store your digital assets on our servers You store your digital assets your server and link them to your products in the ...